Any Teams meeting or call can be recorded for future viewing. The recording captures audio, video, and screen sharing activity, and you can share it securely across your organization.
Start recording
-
Start or join the meeting.
-
Go to the meeting controls and select More actions
 > Start recording.
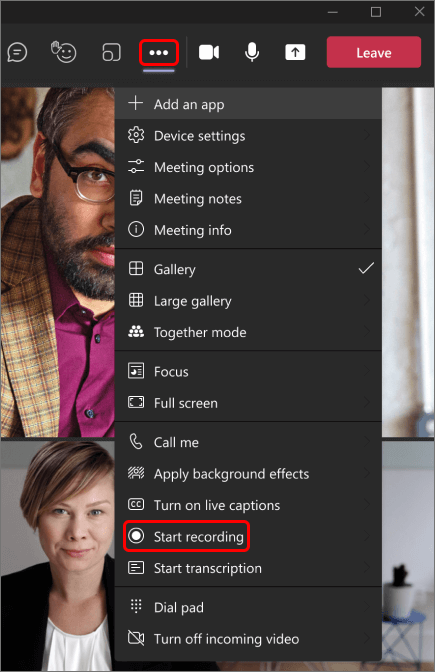
Everyone in the meeting gets notified that recording and transcription have started.

Notes:
-
You can't make multiple recordings of the same meeting at the same time. If one person starts recording a meeting, that recording will be stored on the cloud and available to all participants.
-
Meeting participants have the option of viewing the transcription during the meeting. For details, see view live transcription.
-
Stop recording
-
Go to the meeting controls and select More actions
. -
Choose one of the following:
-
Stop recording: Stops the recording and live transcription.
-
Stop transcription: Stops just the live transcription. The recording continues until you select Stop recording.
-
Find recordings
Recordings are available in different places depending on the type of meeting.
-
The recording is processed and saved to SharePoint if it was a channel meeting or OneDrive if it was any other type of meeting.
-
The meeting recording shows up in the meeting chat or channel conversation (if you’re meeting in a channel).
Comments
Please sign in to leave a comment.